Showing posts with label Broccoli. Show all posts

Cheesy Zucchini Bites


If there is one thing you can count on during the summer, it’s zucchini, and plenty of it!

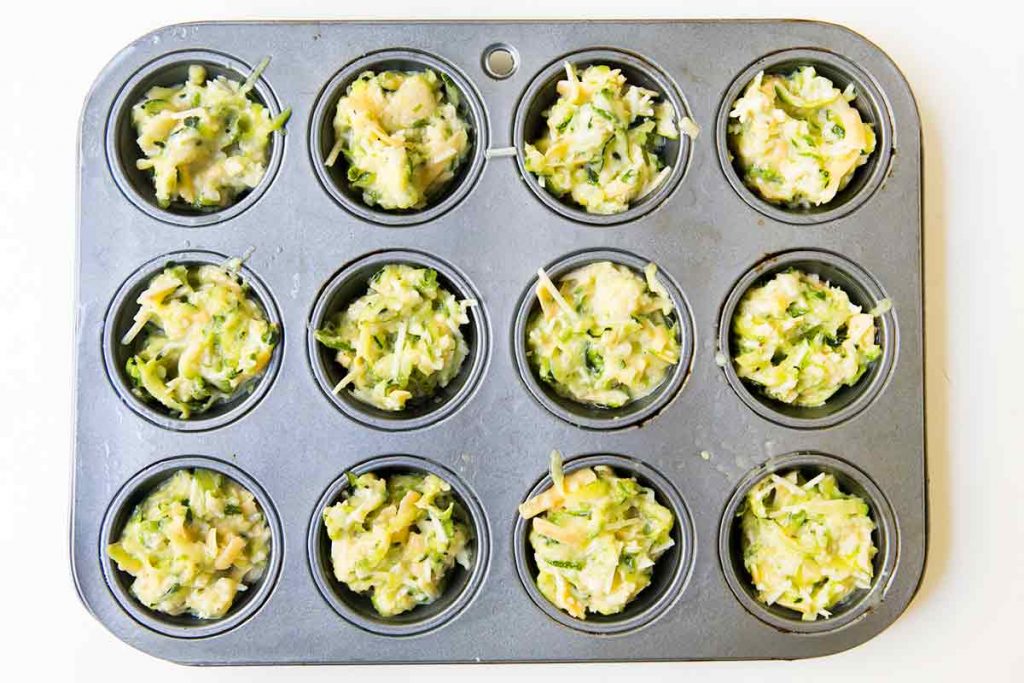
These cheesy little zucchini bites are a great way to put all that zucchini to use. They’re like tater tots, but made with zucchini, in a mini muffin pan. They’re sort of a riff off our broccoli cheddar bites, and like their broccoli cousins, are perfect for breakfast, a quick snack, or a school lunch.

A touch of rosemary with some lemon zest with cheddar cheese and Parmesan work great with the zucchini. The lemon and rosemary are just enough to make these bites interesting, but not so much as to overwhelm.

The trick to this recipe, as with so many recipes that use shredded zucchini, is to first salt the zucchini and let the excess water drain. That’s the best way to avoid a mushy mess when you bake it.
You can make them ahead, freeze them, and just reheat in a toaster oven or microwave. They’re rather addictive, so freezing them is my strategy to keep from eating them all in one go!


Cheesy Zucchini Bites Recipe


Ingredients


  • 2 pounds of zucchini, grated (large holes of a box grater)

  • 1/2 teaspoon salt

  • 1/4 cup mayonnaise

  • 3 eggs

  • 3/4 cup diced fresh bread (without crust)

  • 1/2 cup minced green onions (including green parts)

  • 2 cloves garlic, minced, about 2 teaspoons

  • 1 1/2 teaspoons grated lemon zest

  • 1/4 teaspoon minced fresh rosemary

  • 1/2 cup grated cheddar cheese

  • 1/4 cup grated Parmesan cheese

  • 1/4 teaspoon black pepper

  • 2 teaspoons of olive oil to coat mini muffin tins


Special equipment:
  • 2 12-well mini-muffin tins


Read More: Cheesy Zucchini Bites


.
.
.


How To Steam-Fry Vegetables


Need a quick side dish of vegetables to go with your meal? Try steam-frying them!

Using this method, you quickly stir-fry vegetables to develop some color, and then steam them until tender. Steam-frying uses less oil than a regular stir-fry, but the vegetables still quickly cook through.
The veggies also pick up a little browning from the stir-fry step and some flavor from the liquid used for the steaming step, making them more exciting than plain steamed vegetables.

You can use this technique to cook just about any vegetable in the fridge, from cauliflower to green beans.

The most important piece of equipment for steam-frying is a medium to large skillet. Nonstick, stainless steel, or cast iron skillets are all fine, so use what you have and feel comfortable with. You’ll also need a lid for your skillet.

The size of skillet depends on how many people you’re feeding. Use a 10-inch skillet to make about 4 servings of vegetables, or a 12-inch skillet if you’re making six servings.

The steam-frying method is pretty simple: Heat a little oil in a pan, add the vegetables and a pinch of salt, then stir-fry just long enough to get a little bit of color on the veggies. After that, add a splash of liquid to the pan and quickly cover with a lid to trap the steam inside.

For the liquid, you can use water, stock, juice, wine, beer… most any liquid will do, really!.You want just enough liquid to steam the vegetables, not braise them. This means about two tablespoons of liquid for four servings (about 1 pound of vegetables) or, 3 or 4 tablespoons for six servings (about 1 1/2 pounds of vegetables).

At this point, you also can also add extra flavoring ingredients like soy sauce, fish sauce, or a squeeze of lemon.

The vegetables steam their way to tenderness in just a few minutes. Use a fork to spear a vegetable and check if it’s tender and cooked through. If it is, let the vegetables cook, uncovered, for another minute to let the steam evaporate.. If they’re still not done, add another tablespoon or two of liquid, close, and steam a bit longer.

Some of my favorite vegetables to steam fry are broccoli, cauliflower, carrots, bell peppers, onion, fennel, zucchini, and green beans. So they all cook at the same speed, these vegetables should be cut into bite-sized pieces for cooking. Aim for 1- to 2-inch lengths for green beans. For broccoli and cauliflower, chop or break them up into 1-inch florets.

Carrots and other hardy vegetables are also great for steam-frying. Slice them thinly (1/4 inch or so) before cooking and cook them alongside other vegetables. (FYI, asparagus is also great steam-fried, but will cook slightly more quickly than other vegetables. Best to cook asparagus separately.)

For some extra flavor once the vegetables are done cooking, add a handful of chopped herbs, a squeeze of lemon, or a drizzle of aged balsamic vinegar.

Broccoli, Rice, and Chicken Casserole


This easy broccoli, rice, and chicken casserole is topped with a buttery Ritz cracker crust. This meal comes together in less than 45 minutes and it takes one bowl and one casserole dish! Put this together ahead of time and pop it in the oven when you get home from work!

Welcome back, everyone! I hope you all had a very happy Thanksgiving with friends and family and I hope you ate lots and lots of delicious, hearty food! Who’s struggling just a bit to get back into the groove? I definitely am. I totally do not want to be at a training class right now. I seriously loathe classes. I was never one to just sit still and listen to a lecture. *sigh* I also can’t believe it’s already December. 2014 will be here before you know it. Just crazy!

What’s also crazy is Paul Walker. I still cannot believe he died this past weekend. When Jason told me that, I totally wanted to throw a pillow at him and to tell him to stop kidding around. I guess I just never thought an actor from my generation would pass this early. I’m sorry if this is a really weird topic for you, but basically Paul Walker and the Fast and Furious movies paved my affection for cars. I won’t ever admit it (well, I guess I am right now), but I really do enjoy watching everything about cars. Blame it on the guys I dated and the one I’m married to, but I seriously adore watching car shows and movies. Top Gear, Fast ‘N Loud, Classic Cars, etc…..R.I.P.

Wanna know the truth about the pictures of this casserole? You probably can’t really tell, but the entire top of this casserole was CARBON BLACK. That is what happens when you forget to set the timer and stick the casserole under the broiler to just get the crust a “bit more color.” Ha, I definitely got that color…I also got an entire house’s fire alarm going off.

So, I stuck the casserole under the broiler, for what I intended to be only 3-5 minutes, but I forgot to set the timer so I went into the living room and got on my laptop and started catching up on email. Your nose knows when you smell that good ‘ole burning scent. I immediately knew what was up and said, “shit!” and ran into the kitchen. Opened the oven door to see a carbon black casserole and smoke was coming out of the oven. Great. I went and opened all the windows and doors, and the fire alarm still went off. I couldn’t get them to turn off, either. I had to get on my laptop to Google how to turn them off, but I still couldn’t get them to turn off!! They’re all connected to each other so when one goes off, the others go off too. I basically just had to wait until the smoke cleared. Good thing it was a nice-ish day out so having the windows and doors open weren’t a huge deal.

I ended up picking off all the burnt pieces (with some left behind, as you can see in the photos above, but don’t they just look like ground pepper flakes?) and was able to salvage the casserole! Huzzah! Yeah, it was really easy to pick off the pieces because it was just like an entire sheet of burnt of Ritz crackers so you could pick them off in large pieces. :) when you make this casserole, don’t make the mistake I made!

Broccoli, Rice, and Chicken Casserole

Prep Time10 mins
Cook Time50 mins
Total Time1 hrs

This easy broccoli, rice, and chicken casserole is topped with a buttery Ritz cracker crust. This meal comes together in less than 45 minutes and it takes one bowl and one casserole dish!
Servings: 4

Ingredients
  •     5 chicken tenderloins cut into 1-inch cubes, uncooked
  •     1 cup white rice, uncooked OR instant rice (different types of rice will yield very different cook times. I used sushi rice. Due to the number of folks who have tried this recipe & still say their rice is crunchy, I highly suggest you use instant rice)
  •     2 1/4 cup whole milk
  •     1: 10.75 ounce can of cream of chicken
  •     1 1/2 cup frozen broccoli florets, thawed
  •     1 3/4 cup extra sharp cheddar cheese, shredded
  •     1 sleeve Ritz crackers, crushed

Read More : Broccoli, Rice, and Chicken Casserole

15 Minute Honey Garlic Shrimp


So here’s a confession: Until a few months ago, I didn’t like shrimp, or many other seafood dishes. I know, I know, what kind of a foodie am I to disregard a whole type of protein? But then I came across this recipe for Honey Garlic Shrimp, and all that glossy, sticky sauce looked irresistible to me. After all, I am a big fan of anything honey + garlic.

Also, a delicious dinner ready in 15 minutes? That’s a total winner in my book.
Sigh, I love how my job description entails trying out new recipes and baking delicious treats. 😀
So I think it’s about time that we had something healthy for dinner, right?
Not only is this Honey Garlic Shrimp, amazingly delicious, it is also healthy.
So this really might be a miraculous combo of three things that make a recipe perfect:
Delicious.
Fast.
Healthy.
Seriously, what could be better than such a package? Nothing, I guess.
Plus, if you’re a beginner cook, this recipe is perfect for you to try out. I mean, if you can a boil an egg, then you can definitely make this recipe, and impress your friends and family with your culinary skills. 😉

Okay, before I leave you to make this wonderful 15 Minute Honey Garlic Shrimp, here are a few tips to make sure you end up with the perfect 15 Minute Honey Garlic Shrimp! 🙂

How to Make the Perfect 15 Minute Honey Garlic Shrimp


1.) Make sure you get peeled and deveined shrimp. You can leave the tail on if you want, but I got it removed from my seafood guy at the supermarket. I used jumbo shrimp. I would also suggest using fresh shrimp for this recipe, but frozen should work fine too.

2.) The recipe requires you to make a marinade for the shrimp. The shrimp is marinated for about 10 minutes in half of the marinade, and the rest of the marinade is reserved for the sauce. Discard the used marinade (in which the shrimp was marinated) and just use the reserved marinade for the sauce.

3.) Now, this is the most important tip: Do not overcook the shrimp. Shrimp literally takes a few minutes to cook through, and if overcooked it becomes extra tough and stringy. And overcooked shrimp is a total no no in the world of deliciousness. Cook the shrimp on one side for about 45 seconds, and then flip and repeat the same for the other side. And that is another reason why I now love shrimp so much – because it literally takes no time too cook! 🙂

I served this 15 Minute Honey Garlic Shrimp with steamed rice and broccoli, and it was a perfect wholesome and scrumptious dinner. Even my toddler loved it, and we all know how picky toddlers can be! 🙂

15 Minute Honey Garlic Shrimp

This 15 Minute Honey Garlic Shrimp is a perfect delicious and healthy weeknight dinner, which your whole family will love!
Prep Time 10 minutes   
Cook Time 5 minutes   
Total Time 15 minutes

Ingredients
  •     1/3 cup honey
  •     1/4 cup soy sauce
  •     1 Tablespoon minced garlic
  •     1 teaspoon minced fresh ginger
  •     500 grams medium uncooked shrimp peeled and deveined
  •     2 tablespoons oil
  •     Green onion chopped for garnishing 
 

Read More :  Honey Garlic Shrimp